Free Resource! Check it out :)
http://www.afb.org/braillebug/Braille.asp
Friday, February 25, 2011
Tuesday, February 22, 2011
Monday, February 21, 2011
Link to the Resource Manual
Resource Manual
The above link will take you to a .pdf of the Resource Manual. This is a document we use to guide us with the evaluation process and observations. Scroll to Page 47 to learn more about the Standards and Elements.
The above link will take you to a .pdf of the Resource Manual. This is a document we use to guide us with the evaluation process and observations. Scroll to Page 47 to learn more about the Standards and Elements.
Sunday, February 20, 2011
Signing In
 An example of a daily "sign-in" sheet. You can also provide a piece of paper (no lines!) and name cards for children who need them. You may also want to consider providing name cards with a picture of the child next to their name, if there are children in your classroom that need the support.
Saturday, February 19, 2011
Friday, February 18, 2011
Making Connections
Have you ever noticed that many young children get fidgety when you read to them? Children (and let's face it, adults!) like to actively engage with their environment. And just like you and I, young children are capable of listening while "fidgeting" with something. Do you doodle at workshops? I do... and when I doodle I have a much easier time staying focused. Think of it the same way with your students... some people just need to move and "do" at all times.
I think I am particularly sensitive about this because I understand it. And when I was in the classroom I tried really hard to provide some kind of tangible object that I could pass out to the kids who wanted or needed it. It can be really simple... here are some quick examples: when talking about outer-space, hand out little pom-poms (planets, stars, moons); when taking about snow or winter, hand out pieces of cotton (snow); when talking about construction hand out little rocks; when talking about Fall hand out acorns or leaves... the list goes on and on. When I read The Very Hungry Caterpillar I handed out foods from dramatic play; when I read Caps for Sale I handed out paper hats that we'd made; when I read Blueberies for Sal I handed out plastic grapes. The children don't care if the object is exactly like the object that is in the book. They like the connection though, and it helps make it concrete for them. Use your imagination and the sky is the limit. What can you turn cotton or pom poms into? Please share your ideas in the comments below! :)
Also, below are a couple of pictures of things that were made to accompany books. They are simple and inexpensive... have fun and be creative!
What can you do to make your stories come to life?
 These are construction paper sea animals to accompany the book Swimmy by Leo Lionni.
 These are felt pieces to accompany The Jacket I Wear in the Snow.
 The cast from Brown Bear, Brown Bear.
Food for Thought
"Education is not the filling of a bucket, but the lighting of a fire."
~William Butler Yeats
~William Butler Yeats
- What does this quote mean to you?
- Are you "lighting the fire" of the children you teach, or extinguishing the flame?
- Are you excited about the possibilities of each day, and do you share your enthusiasm for learning and discovery with the children in your classroom?
- How can you turn your students on to learning?
- What steps can you take to engage every child?
- If you were a child in your classroom would you have fun? Would you enjoy spending the day there?
- What is the most important thing you can do each day...? And do you do it?
Thursday, February 17, 2011
Magnetic Letters

A teacher in Wake County created this activity for the children in her classroom. She provided environmental print and some picture cards along with magnetic letters. This was a very popular activity the day I was there!
Pete the Cat
Pete the Cat story telling video
Have you heard of Pete the Cat? Click on the link above to see a live telling of the story.
Have you heard of Pete the Cat? Click on the link above to see a live telling of the story.
Parent Involvement

Looking for ways to get your parents involved? This example is provided by a teacher in Harnett County. She has it posted near the entrance on the side of the cubbies. Isn't this great?!
Tuesday, February 15, 2011
Sunday, February 13, 2011
Birthday Chart

This is a clever way to display birthdays. The months of the year are written across the bottom of the poster board (in orange) and the children's pictures are in columns above the month of their birthday. This is a great graphing activity.
Old-Fashioned Play Builds Serious Skills
The link below will take you to a wonderful article - please take a few moments to read it.
Above the article is a tab (it says "Listen to the Story") that you can click on for audio that accompanies the article. It's wonderful - make sure you check it out!
Old-Fashioned Play Builds Serious Skills
Above the article is a tab (it says "Listen to the Story") that you can click on for audio that accompanies the article. It's wonderful - make sure you check it out!
Old-Fashioned Play Builds Serious Skills
Thursday, February 10, 2011
Winter Weather Activity

Take advantage of the cold weather and have some fun with science! Children are little scientists... they love to figure out how things work! We took blue and green paint and watered it down a lot... and then poured it into an ice cube tray. We placed the ice-cube tray outside and the children took guesses at what would happen overnight. The next morning when everyone arrived we went outside to retrieve our ice cube tray, and found that the colorful water was frozen solid! I placed some of the frozen cubes in a plastic bin for exploration, and some on a plate in the art center so the children could paint with them.
Spring is coming! What can you do in your classroom to take advantage of our last few weeks of freezing temps?
Another Idea for Name Cards
 Here is another example of how to use name cards in your classroom. Here Arturo uses magnetized letters and a name card to spell his name. Note that he knows an "r" is the same as a "R" and has substituted an "h" for a "u" (he turned the "h" upside down). This is a meaningful, hands-on way for children to learn letters. What can you do with name cards in your room? Get creative and share your ideas in the comments section! PS: Cheap cookie sheets are perfect companions for magnetic letters!
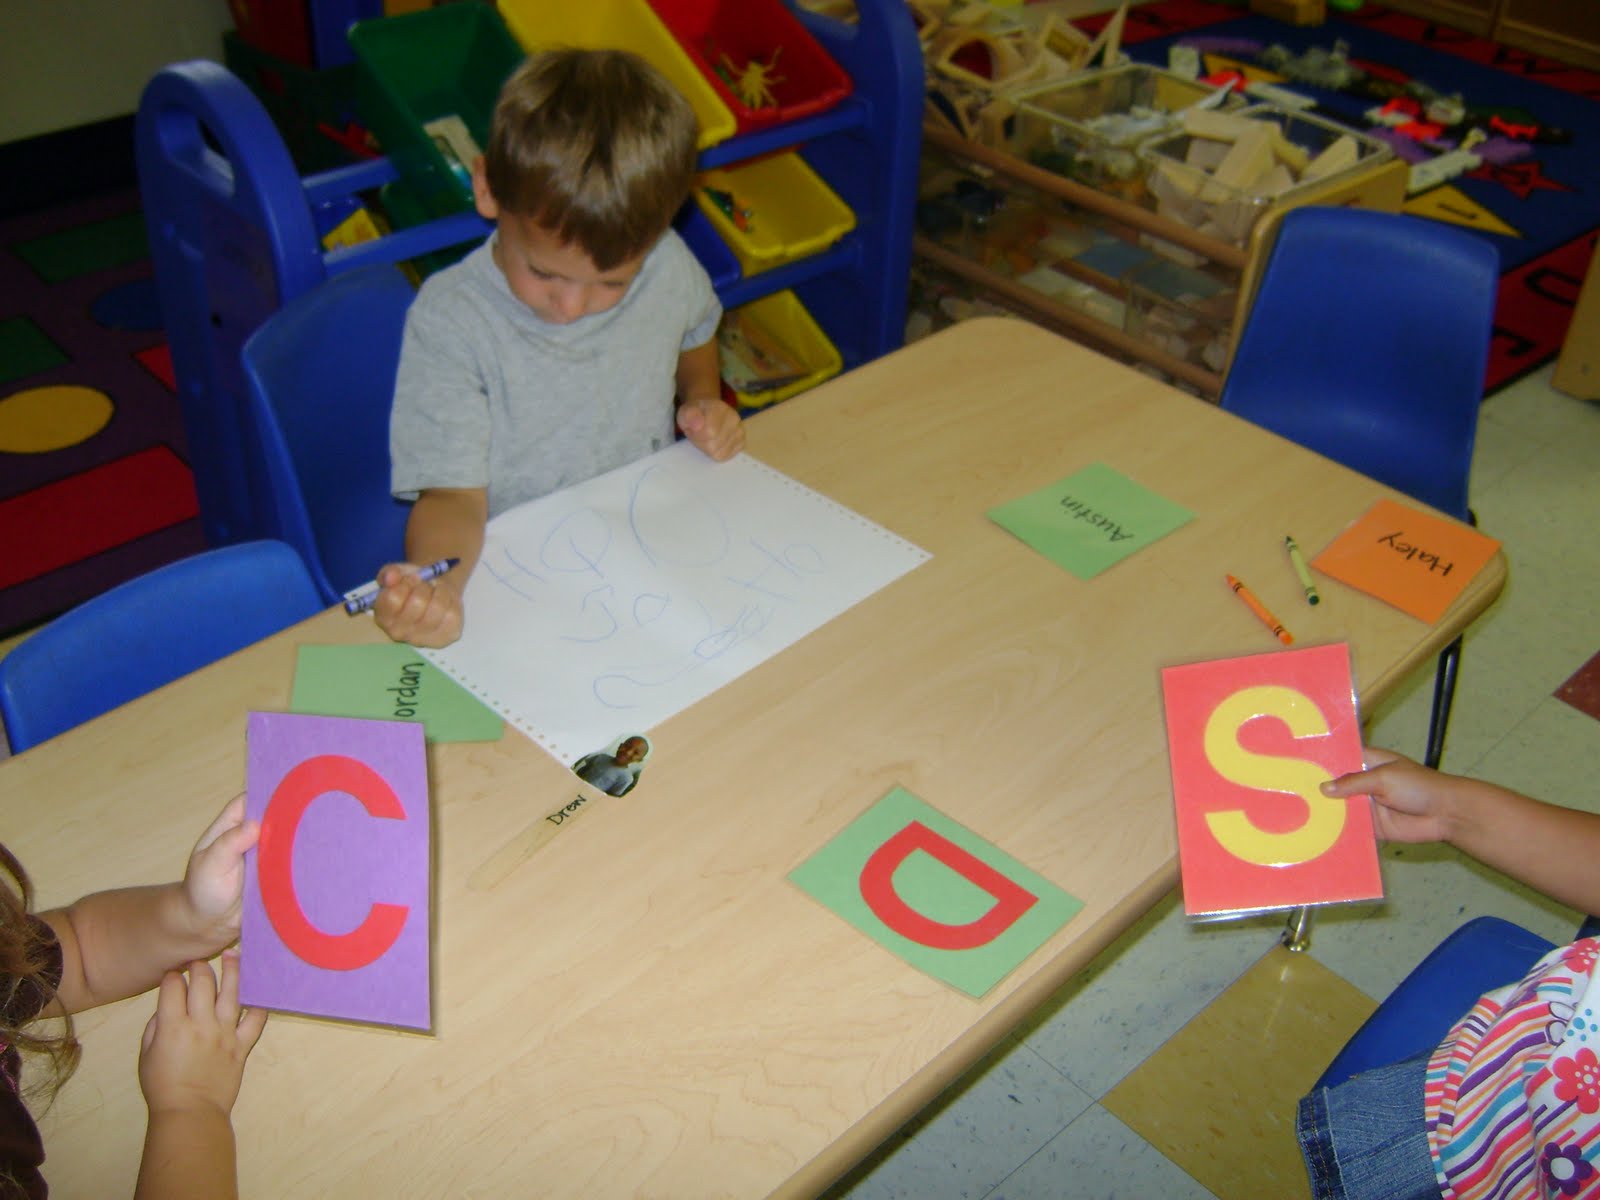
Name Cards
 Using name cards is a great way to help children identify and write their names. In the image above Susie uses her friend Sinai's name card to practice writing her name. Children love to learn how to identify and write their own names, but they also enjoy learning the names of friends and family.
If you look closely in this picture you will see some examples of the children's writing on the wall. Children love to display their work!
Also on the wall is a letter we wrote and mailed. The children "wrote" (I wrote the words but they decided what we'd write, and each child signed their name) a letter to my sons and my sons wrote them back. This created wonderful conversation about letter writing and mail in general. We charted the number of days it took for the mail to be delivered from school to my house, and the number of days it took for Joey and Jack's response to get from our house to school. The kids were very excited when the letter arrived. They enjoyed looking at the post mark and stamps, and we compared the two envelopes, the dates on the envelopes, etc. It was a really meaningful experience and we had a lot of fun with it.
This is another example of name cards. These have each child's name on one side, and the first letter of their name on the other. These name cards were in the art center and the children used them as a reference when they were autographing their works of art.
Saturday, February 5, 2011
KWL Chart
 This is an example of how I used a KWL Chart in my prekindergarten classroom. For those of you that don't know, KWL stands for "Know," "Want to know," and "Learned." In this situation, we were reading Good Morning, Chick. After we'd done a picture walk I asked the children what they knew about the story, and wrote down their responses under "K." Then we discussed what they wanted to know, based on the pictures they'd seen and the information they had. I wrote their responses in the "W" column. I explained that the next day we'd read the book, and then we would have more information. The next day before I read we reviewed what we had written down in the "K" and "W" columns. After I read the story we talked about what we had learned and I wrote that down in the "L" column. Then we discussed all of the elements of the chart and made decisions about what we wanted to learn more about.
(If you click on the picture it will enlarge)
Friday, February 4, 2011
In this picture...
 (Click on the picture to make it bigger)
I used sequencing cards in a variety of ways. In this picture you can see sequencing picture cards and sentences that tell the folk tale The Little Red Hen. In this particular activity I used them to retell the story, and then invited the children to come up to retell the story in their own words.
I tried to make picture cards to accompany stories whenever possible. It's fairly easy to find images online, or if they are simple images you can sketch them yourselves. The pictures don't have to look exactly like the ones in the story - the children won't mind.
Another thing to share: Next to the sentence strips and pictures, you can see a rain stick. I used the rain stick as a cue for transitions. Children respond so much better to change when they know it's coming (don't we all!?), so I made sure to give them a warning before a change. I would turn the rain stick to get everyone's attention (this worked better than trying to get everyone's attention verbally) and let them know what transition was coming, and how much time I was putting on the timer. When the timer went off I would hold the rain stick up and turn it over, signaling the time for transition. If you've never heard a rain stick, they make a sound that is intended to sound like a heavy rain. It's fairly soothing, and worked well for this purpose.
Subscribe to:
Comments (Atom)